Difference between revisions of "Instances"
| (31 intermediate revisions by the same user not shown) | |||
| Line 1: | Line 1: | ||
| − | |||
| − | |||
| − | |||
| − | |||
| − | |||
| − | |||
| − | |||
| − | |||
| − | + | __TOC__ | |
| − | |||
| − | |||
| − | + | | |
| − | |||
| − | |||
| − | |||
| − | |||
| − | |||
| − | |||
| − | |||
| − | |||
| − | |||
| − | |||
| − | |||
| − | |||
| − | |||
| − | |||
| − | |||
| − | |||
| − | |||
| − | |||
| − | |||
| − | |||
| − | |||
| − | + | | |
| − | |||
| − | |||
| − | |||
| − | |||
| − | |||
| − | |||
| − | + | | |
| − | |||
| − | |||
| − | |||
| − | |||
| − | |||
| − | |||
| − | |||
| − | |||
| − | |||
| − | |||
| − | |||
| − | |||
| − | |||
| − | + | | |
| − | + | == About == | |
| − | + | Instances (also known as Memorial Dungeons) are one of the defining features imported from Renewal Ragnarok. | |
| − | + | ||
| − | + | They are dungeons which can only be accessed once a party triggers the creation of the specific map. Once created, the instance will only be accessible to the party that created it. Other parties who wish to enter the dungeons will have to create a different instance of the map, which is where the term "instance" comes from.<br/> There are all kinds of instances, including solo instances. To enter said instances, you must create a single-person party.<br/> ''« Talk to the Instance Manager in veil town @warp veil 85 84, pick a instance you want to do and create it to join. »''<br/> | |
| − | + | ||
| − | + | | |
| − | |||
| − | |||
| − | |||
| − | |||
| − | <br | ||
| − | + | | |
| − | |||
| − | |||
| − | |||
| − | |||
| − | |||
| − | |||
| − | |||
| − | |||
| − | |||
| − | |||
| − | |||
| − | |||
| − | |||
| − | |||
| − | |||
| − | |||
| − | |||
| − | + | | |
| − | |||
| − | |||
| − | |||
| − | |||
| − | |||
| − | |||
| − | |||
| − | |||
| − | |||
| − | |||
| − | |||
| − | |||
| − | |||
| − | |||
| − | |||
| − | |||
| − | |||
| − | |||
| − | |||
| − | |||
| − | |||
| − | |||
| − | |||
| − | |||
| − | |||
| − | == | + | == Aruna Instances == |
| − | |||
| − | |||
| − | |||
| − | |||
| − | |||
| − | |||
| − | |||
| − | |||
| − | |||
| − | |||
| − | |||
| − | |||
| − | |||
| − | |||
| − | |||
| − | |||
| − | |||
| − | |||
| − | === | + | <br/> {{Instance |
| − | {{Instance | + | |Name=Endless Tower |
| − | |Name= | + | |Image=InstanceET |
| − | |Image= | + | |Level=50 |
| − | |Level= | + | |Cooldown=3 days |
| − | |Cooldown=23 | + | |Desc=Fight various MVP bosses and<br> challenge the enigmatic {{monster |id=1956 Naght Sieger}}! |
| − | |Desc= | + | |Link=Endless Tower |
| − | |Link= | + | }} {{Instance |
| + | |Name=Sealed Shrine | ||
| + | |Image=Instances06 | ||
| + | |Level=75 | ||
| + | |Cooldown=12 Hours | ||
| + | |Desc=Challenge the legendary {{monster |id=1929 Baphomet}}<br />and craft a {{item |id=5374 Gigantic Magestic Goat}} | ||
| + | |Link=Sealed Shrine | ||
| + | }} {{Instance | ||
| + | |Name=Nidhoggur's Nest | ||
| + | |Image=Instance08 | ||
| + | |Level=70 | ||
| + | |Cooldown=23 Hours | ||
| + | |Desc=Get a chance to vanquish<br />Nidhoggur's Shadow | ||
| + | |Link=Nidhoggurs_Nest | ||
| + | }} {{Instance | ||
| + | |Name=Orc Memory Dungeon | ||
| + | |Image=Instance07 | ||
| + | |Level=30 | ||
| + | |Cooldown=2 Hours | ||
| + | |Desc=Time-travel and fight an {{monster |id=1087 Orc Hero}} | ||
| + | |Link=Orc Memory Dungeon | ||
}} | }} | ||
| − | |||
| − | |||
| − | |||
| − | |||
| − | |||
| − | |||
| − | |||
| − | |||
| − | |||
| − | + | | |
| − | + | <br clear="all"> | |
| − | |||
| − | |||
| − | |||
| − | |||
| − | |||
| − | |||
| − | |||
| − | |||
| − | |||
| − | |||
| − | |||
| − | |||
| − | |||
| − | |||
| − | |||
| − | <br clear=" | ||
| − | |||
{{Instance | {{Instance | ||
|Name=Geffen Magic Tournament | |Name=Geffen Magic Tournament | ||
|Image=InstanceGM | |Image=InstanceGM | ||
|Level=99 | |Level=99 | ||
| − | |Cooldown=23 | + | |Cooldown=23 Hours |
| − | |Desc=Fight powerful warriors for glory<br />and buy exclusive equipment | + | |Desc=Fight powerful warriors for glory<br />and buy exclusive equipment |
|Link=Geffen Magic Tournament | |Link=Geffen Magic Tournament | ||
| − | }} | + | }} {{Instance |
| − | + | |Name=Old Glast Heim | |
| − | + | |Image=InstanceOGH | |
| − | |||
| − | |||
| − | |||
| − | |||
| − | |||
| − | |||
| − | {{Instance | ||
| − | |Name= | ||
| − | |Image= | ||
|Level=130 | |Level=130 | ||
| − | |Cooldown=23 | + | |Cooldown=23 Hours |
| − | |Desc= | + | |Desc=Investigate a mysterious time gap <br> and craft powerful [[Temporal Boots]] |
| − | |Link= | + | |Link=Old Glast Heim |
| − | }} | + | }} {{Instance |
| − | |||
| − | |||
| − | |||
| − | {{Instance | ||
|Name=Faceworm's Nest | |Name=Faceworm's Nest | ||
|Image=Instance05 | |Image=Instance05 | ||
| Line 212: | Line 78: | ||
|Link=Faceworm's Nest | |Link=Faceworm's Nest | ||
}} | }} | ||
| − | |||
| − | |||
| − | |||
| − | |||
| − | |||
| − | |||
| − | |||
| − | |||
| − | |||
| − | + | | |
| − | + | ||
| − | + | | |
| − | + | <br clear="all"> | |
| − | + | == Aruna 14.1 Expansion Instances == | |
| − | + | ||
| − | + | === '''Malangdo''' === | |
| − | |||
| − | |||
| − | |||
| − | |||
| − | |||
| − | |||
| − | |||
| − | |||
| − | |||
| − | |||
| − | |||
| − | |||
{{Instance | {{Instance | ||
|Name=Malangdo Culvert | |Name=Malangdo Culvert | ||
| Line 249: | Line 94: | ||
|Desc=Exterminate {{monster |id=2189 Coelacanths}} and gain<br />materials for [http://irowiki.org/wiki/Malangdo_Enchants Enchantments]! | |Desc=Exterminate {{monster |id=2189 Coelacanths}} and gain<br />materials for [http://irowiki.org/wiki/Malangdo_Enchants Enchantments]! | ||
|Link=Malangdo Culvert | |Link=Malangdo Culvert | ||
| − | }} | + | }} {{Instance |
| − | {{Instance | ||
|Name=Octopus Cave | |Name=Octopus Cave | ||
|Image=Instance11 | |Image=Instance11 | ||
| Line 258: | Line 102: | ||
|Link=Octopus Cave | |Link=Octopus Cave | ||
}} | }} | ||
| − | |||
| − | ==Port Malaya== | + | |
| + | <br clear="all"> | ||
| + | === '''Port Malaya''' === | ||
| + | |||
{{Instance | {{Instance | ||
|Name=Bangungot Hospital | |Name=Bangungot Hospital | ||
| Line 268: | Line 114: | ||
|Desc=Gain access to an abandoned hospital <br> and exterminate the {{monster |id=2317 evil spirit}} within! | |Desc=Gain access to an abandoned hospital <br> and exterminate the {{monster |id=2317 evil spirit}} within! | ||
|Link=Bangungot Hospital | |Link=Bangungot Hospital | ||
| − | }} | + | }} {{Instance |
| − | {{Instance | ||
|Name=Bakonawa Lake | |Name=Bakonawa Lake | ||
|Image=InstanceBL | |Image=InstanceBL | ||
| Line 276: | Line 121: | ||
|Desc=Track down and hunt the legendary <br>{{monster |id=2322 Devourer of the moon!}} | |Desc=Track down and hunt the legendary <br>{{monster |id=2322 Devourer of the moon!}} | ||
|Link=Bakonawa Lake | |Link=Bakonawa Lake | ||
| − | }} | + | }} {{Instance |
| − | {{Instance | ||
|Name=Buwaya Cave | |Name=Buwaya Cave | ||
|Image=InstanceBC | |Image=InstanceBC | ||
| Line 285: | Line 129: | ||
|Link=Buwaya Cave | |Link=Buwaya Cave | ||
}} | }} | ||
| − | |||
| − | == | + | |
| + | |||
| + | | ||
| + | <br clear="all"> | ||
| + | |||
| + | |||
| + | |||
| + | == Aruna 14.2 Expansion Instances == | ||
| + | |||
| + | === '''Prontera''' === | ||
| + | |||
{{Instance | {{Instance | ||
| − | |Name= | + | |Name=Wave Mode |
| − | |Image= | + | |Image=Wavemode |
| − | |Level= | + | |Level=100 |
| − | |Cooldown= | + | |Cooldown=0 Minute |
| − | |Desc= | + | |Desc=Wave Mode Memorial Dungeon! |
| − | |Link= | + | |Link=Wave_Mode |
| − | }} | + | }} |
| + | |||
| + | | ||
| + | |||
| + | | ||
| + | <br clear="all"> | ||
| + | |||
| + | === '''Xmas''' === | ||
| + | |||
{{Instance | {{Instance | ||
|Name=Horror Toy Factory | |Name=Horror Toy Factory | ||
|Image=Instance02 | |Image=Instance02 | ||
| − | |Level= | + | |Level=140 |
| − | |Cooldown= | + | |Cooldown=16 Hours |
|Desc=Sneak into a toy factory and <br>find the puppet {{monster |id=2996 Celine Kimi}}! | |Desc=Sneak into a toy factory and <br>find the puppet {{monster |id=2996 Celine Kimi}}! | ||
|Link=Horror Toy Factory | |Link=Horror Toy Factory | ||
| − | }} | + | }} |
| − | + | ||
| − | + | | |
| − | + | ||
| − | + | | |
| − | + | <br clear="all"> | |
| − | + | ||
| − | + | === '''Dimensional Crack''' === | |
| − | |||
| − | <br clear=" | ||
| − | |||
| − | |||
| − | |||
| − | |||
| − | |||
| − | |||
| − | |||
| − | |||
| − | |||
| − | |||
| − | |||
| − | |||
| − | |||
| − | |||
| − | |||
| − | |||
| − | |||
| − | |||
| − | |||
| − | |||
| − | |||
| − | |||
| − | |||
| − | |||
| − | |||
| − | |||
| − | |||
| − | |||
| − | |||
| − | |||
| − | |||
| − | |||
| − | |||
| − | |||
| − | |||
| − | |||
| − | |||
| − | |||
| − | |||
| − | |||
| − | |||
| − | |||
| − | |||
{{Instance | {{Instance | ||
| − | |Name= | + | |Name=Airship Raid |
| − | |Image= | + | |Image=Airship |
| − | |Level= | + | |Level=125 |
| − | |Cooldown= | + | |Cooldown=24 Hours |
| − | |Desc= | + | |Desc=Memorial Dungeon: Airship Assault! |
| − | + | |Link=Airship Raid | |
| − | |||
| − | |||
| − | |||
| − | |||
| − | |||
| − | |||
| − | |||
| − | |Link= | ||
}} | }} | ||
| − | |||
[[Category:Features]] [[Category:Instances]] | [[Category:Features]] [[Category:Instances]] | ||
Latest revision as of 03:51, 13 August 2023
Contents
About
Instances (also known as Memorial Dungeons) are one of the defining features imported from Renewal Ragnarok.
They are dungeons which can only be accessed once a party triggers the creation of the specific map. Once created, the instance will only be accessible to the party that created it. Other parties who wish to enter the dungeons will have to create a different instance of the map, which is where the term "instance" comes from.
There are all kinds of instances, including solo instances. To enter said instances, you must create a single-person party.
« Talk to the Instance Manager in veil town @warp veil 85 84, pick a instance you want to do and create it to join. »
Aruna Instances
| Endless Tower |
|---|

|
| Fight various MVP bosses and challenge the enigmatic Naght Sieger! |
| Required Level: 50+ |
| Cooldown: 3 days |
| Guide |
| Sealed Shrine |
|---|

|
| Challenge the legendary Baphomet and craft a Gigantic Magestic Goat |
| Required Level: 75+ |
| Cooldown: 12 Hours |
| Guide |
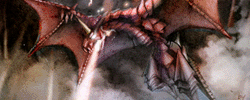
| Nidhoggur's Nest |
|---|
|
| Get a chance to vanquish Nidhoggur's Shadow |
| Required Level: 70+ |
| Cooldown: 23 Hours |
| Guide |

| Geffen Magic Tournament |
|---|

|
| Fight powerful warriors for glory and buy exclusive equipment |
| Required Level: 99+ |
| Cooldown: 23 Hours |
| Guide |
| Old Glast Heim |
|---|

|
| Investigate a mysterious time gap and craft powerful Temporal Boots |
| Required Level: 130+ |
| Cooldown: 23 Hours |
| Guide |
| Faceworm's Nest |
|---|

|
| Travel to the past and hunt the extinct Faceworms! |
| Required Level: 140+ |
| Cooldown: 23 hours |
| Guide |
Aruna 14.1 Expansion Instances
Malangdo
| Malangdo Culvert |
|---|

|
| Exterminate Coelacanths and gain materials for Enchantments! |
| Required Level: 140+ |
| Cooldown: 1 hours |
| Guide |
| Octopus Cave |
|---|

|
| Fight against a Giant Octopus and gain materials for Enchantments! |
| Required Level: 60+ |
| Cooldown: 3 hours |
| Guide |
Port Malaya
| Bangungot Hospital |
|---|

|
| Gain access to an abandoned hospital and exterminate the evil spirit within! |
| Required Level: 100+ |
| Cooldown: 23 hours |
| Guide |
| Bakonawa Lake |
|---|

|
| Track down and hunt the legendary Devourer of the moon! |
| Required Level: 140+ |
| Cooldown: 23 hours |
| Guide |
| Buwaya Cave |
|---|

|
| Investigate rumors about a treasure and defeat the elusive Buwaya! |
| Required Level: 130+ |
| Cooldown: 23 hours |
| Guide |
Aruna 14.2 Expansion Instances
Prontera
| Wave Mode |
|---|

|
| Wave Mode Memorial Dungeon! |
| Required Level: 100+ |
| Cooldown: 0 Minute |
| Guide |
Xmas
| Horror Toy Factory |
|---|

|
| Sneak into a toy factory and find the puppet Celine Kimi! |
| Required Level: 140+ |
| Cooldown: 16 Hours |
| Guide |
Dimensional Crack
| Airship Raid |
|---|

|
| Memorial Dungeon: Airship Assault! |
| Required Level: 125+ |
| Cooldown: 24 Hours |
| Guide |