Difference between revisions of "Instances"
| Line 1: | Line 1: | ||
| + | <div style="float:right; width 300px">__TOC__</div> | ||
| + | == Instance UI == | ||
| + | <br><br> | ||
| + | {{#evt: | ||
| + | service=youtube | ||
| + | |id=https://youtu.be/UPwl4NZjhc4 | ||
| + | }}<br> | ||
| + | <br> | ||
| − | = <br | + | == Instance Points == |
| + | Finishing instances in Shining Moon also grant you [[Instance Points]] based on the difficulty of the instance.<br> | ||
| + | Finishing certain instances also count towards the Weekly Memorial Dungeon Quest from the Instance Manager. <br> | ||
| − | + | <br clear="both"> | |
| + | == Instance Difficulty Modes == | ||
| + | In Shining Moon RO, there are five instance difficulty modes - New Moon (Easy), Crescent Moon (Normal), Quarter Moon (Hard), Nightmare Mode, and Hell Mode.<br> | ||
| + | Each mode has it's own settings regarding exp, drop rates, and damage adjustments. See below for more information.<br> | ||
| + | ====New Moon (Easy)==== | ||
| + | • You deal 25% extra damage to Instance Monsters.<br> | ||
| + | • Monsters deal 10% less damage in this Instance.<br> | ||
| + | • Monsters have halved drop chance on every item.<br> | ||
| + | • Monsters give halved EXP.<br> | ||
| + | ====Crescent Moon (Normal)==== | ||
| + | • You deal normal damage to Instance Monsters.<br> | ||
| + | • Monsters deal normal damage in this Instance.<br> | ||
| + | • Monsters have normal drop chance on every item.<br> | ||
| + | • Monsters give normal EXP.<br> | ||
| + | • Monsters in this difficulty have the PCNEARCHECK, FoVRESET and STATERESET.<br> | ||
| + | ====Quarter Moon (Hard)==== | ||
| + | • You deal 40% less damage to Instance Monsters.<br> | ||
| + | • Monsters deal 5% extra damage in this Instance.<br> | ||
| + | • Monsters have an additional 15% drop chance on every item.<br> | ||
| + | • Monsters give 15% more EXP.<br> | ||
| + | • Boss Monsters have 25% additional HP.<br> | ||
| + | • Monsters in this difficulty have the PCNEARCHECK, FoVRESET and STATERESET.<br> | ||
| − | + | ====Nightmare Mode==== | |
| + | • You deal 70% less damage to Instance Monsters.<br> | ||
| + | • Monsters deal 10% extra damage in the Instance.<br> | ||
| + | • Monsters have an additional 50% drop chance on every item.<br> | ||
| + | • Monsters give 50% more EXP.<br> | ||
| + | • Every Monster in this instance will have a random modifier.<br> | ||
| + | • Monsters in this difficulty have the PCNEARCHECK, FoVRESET and STATERESET.<br> | ||
| − | + | ====Hell Mode==== | |
| + | • You deal 90% less damage to Instance Monster.<br> | ||
| + | • Monsters deal 20% extra damage in this instance.<br> | ||
| + | • Monsters have an additional 100% drop chance on every item.<br> | ||
| + | • Monsters give 100% more EXP.<br> | ||
| + | • Every Monster in this Instance will have a random modifier.<br> | ||
| + | • Monsters in this difficulty have the PCNEARCHECK, FoVRESET and STATERESET.<br> | ||
| + | <br> | ||
| + | <br> | ||
| + | PCNEARCHECK - If you're fighting an Instance Monster and you die, the AI will now automatically count that as no one around it anymore. And not refresh the Hard AI Timer. This only applies to normal and above.<br> | ||
| + | <br> | ||
| + | FoVRESET - If you leave the Field of View of a monster for more than 10 seconds, the monster will automatically reset itself. This only applies to normal and above. <br> | ||
| + | <br> | ||
| + | STATERESET - If you're the only one fighting an Instance Monster and you die, the monster will automatically reset after an interval of 10 seconds which will cause the monster to heal itself back to full health and remove every negative debuff placed on the monster and put the AI back into Lazy mode. This only applies to normal and above. | ||
| − | + | <br clear="both"> | |
| − | + | <br clear="both"> | |
| − | == | + | ==Terra Gloria== |
| + | {{Instance | ||
| + | |Name=Werner Laboratory | ||
| + | |Image=Werner | ||
| + | |Level=160 | ||
| + | |Cooldown=1 day | ||
| + | |Desc=Inside the Heart Hunter Base a massive Laboratory was found. | ||
| + | |Link=Werner Laboratory | ||
| + | }} | ||
| + | <br clear="both"> | ||
| − | + | ==Banquet for Heroes== | |
| + | {{Instance | ||
| + | |Name=Room of Consciousness | ||
| + | |Image=Roomofcon | ||
| + | |Level=100 | ||
| + | |Cooldown=1 day | ||
| + | |Desc=Confront Bijou who's stealing the<br> Heart of Ymir from Tera Gloria! | ||
| + | |Link=Room of Consciousness | ||
| + | }} | ||
| + | {{Instance | ||
| + | |Name=Sky Fortress | ||
| + | |Image=Skyfortress | ||
| + | |Level=145 | ||
| + | |Cooldown=3 days | ||
| + | |Desc=Find the root of Prontera's Invasion<br> and collect Vicious Weapons! | ||
| + | |Link=Sky Fortress | ||
| + | }} | ||
| + | <br clear="both"> | ||
| − | [[ | + | ==Phantasmagorica== |
| + | {{Instance | ||
| + | |Name=Charleston Crisis | ||
| + | |Image=InstanceCC | ||
| + | |Level=130 | ||
| + | |Cooldown=20 hours | ||
| + | |Desc=Help Charleston 2 replacing <br /> her malfunctioning components! | ||
| + | |Link=Charleston Crisis | ||
| + | }} | ||
| + | {{Instance | ||
| + | |Name=Last Room | ||
| + | |Image=InstanceLR | ||
| + | |Level=140 | ||
| + | |Cooldown=23 hours | ||
| + | |Desc=Discover the secrets of a hidden<br> passageway under the safety bunker! | ||
| + | |Link=Last Room | ||
| + | }} | ||
| + | {{Instance | ||
| + | |Name=Central Laboratory | ||
| + | |Image=InstanceCL | ||
| + | |Level=140 | ||
| + | |Cooldown=23 hours | ||
| + | |Desc=Travel to the past and observe<br> an experiment gone wrong! | ||
| + | |Link=Central Laboratory | ||
| + | }} | ||
| + | <br clear="both"> | ||
| + | |||
| + | ==Decisive Battle== | ||
| + | ===Part II=== | ||
| + | {{Instance | ||
| + | |Name=Nightmarish Jitterbug | ||
| + | |Image=InstanceNJ | ||
| + | |Level=120 | ||
| + | |Cooldown=23 hours | ||
| + | |Desc=Go through a musical dungeon and<br> get exclusive equipment! | ||
| + | |Link=Nightmarish Jitterbug | ||
| + | }} | ||
| + | {{Instance | ||
| + | |Name=Temple of the Demon God | ||
| + | |Image=InstanceTG | ||
| + | |Level=160 | ||
| + | |Cooldown=23 hours | ||
| + | |Desc=Confront Satan Morroc in the<br> universe he has created! | ||
| + | |Link=Temple of the Demon God | ||
| + | }} | ||
| + | <br clear="both"> | ||
| + | |||
| + | ===Part I=== | ||
| + | {{Instance | ||
| + | |Name=Bios Island | ||
| + | |Image=InstanceBI | ||
| + | |Level=160 | ||
| + | |Cooldown=23 hours | ||
| + | |Desc=Travel through a land of aging<br> enemies and get heroic gear! | ||
| + | |Link=Bios Island | ||
| + | }} | ||
| + | {{Instance | ||
| + | |Name=Morse's Cave | ||
| + | |Image=InstanceMC | ||
| + | |Level=160 | ||
| + | |Cooldown=23 hours | ||
| + | |Desc=Fight through a demon's twisted<br> imagination. | ||
| + | |Link=Morse's_Cave | ||
| + | }} | ||
| + | <br clear="both"> | ||
| + | |||
| + | ==Heroes' Trails== | ||
| + | ===Part III=== | ||
| + | {{Instance | ||
| + | |Name=Airship Assault | ||
| + | |Image=InstanceAA | ||
| + | |Level=125 | ||
| + | |Cooldown=23 hours | ||
| + | |Desc=Join Chaos and his friends and defend<br /> the airship from Arcana the Witch! | ||
| + | |Link=Airship Assault | ||
| + | }}{{Instance | ||
| + | |Name=Sarah and Fenrir | ||
| + | |Image=InstanceSF | ||
| + | |Level=145 | ||
| + | |Cooldown=3 Days | ||
| + | |Desc=Assist Fenrir in defeating the powerful <br> Valkyrie Sarah! | ||
| + | |Link=Sarah and Fenrir | ||
| + | }} | ||
| + | <br clear="both"> | ||
| + | ===Part II=== | ||
| + | {{Instance | ||
| + | |Name=Geffen Magic Tournament | ||
| + | |Image=InstanceGM | ||
| + | |Level=99 | ||
| + | |Cooldown=23 hours | ||
| + | |Desc=Fight powerful warriors for glory<br />and buy exclusive equipment! | ||
| + | |Link=Geffen Magic Tournament | ||
| + | }} | ||
| + | {{Instance | ||
| + | |Name=Ghost Palace | ||
| + | |Image=Instance04 | ||
| + | |Level=120 | ||
| + | |Cooldown=23 hours | ||
| + | |Desc=Experience Sakray's tragic tale to get<br />Thanatos Weapons & Gray Equipment. | ||
| + | |Link=Ghost_Palace | ||
| + | }} | ||
| + | {{Instance | ||
| + | |Name=Devil's Tower | ||
| + | |Image=InstanceDT | ||
| + | |Level=130 | ||
| + | |Cooldown=23 hours | ||
| + | |Desc=Fight alongside Loki to stop the<br /> ritual of the Evil Believer! | ||
| + | |Link=Devil's_Tower | ||
| + | }} | ||
| + | <br clear="both"> | ||
| + | |||
| + | ===Part I=== | ||
| + | {{Instance | ||
| + | |Name=Faceworm's Nest | ||
| + | |Image=Instance05 | ||
| + | |Level=140 | ||
| + | |Cooldown=23 hours | ||
| + | |Desc=Travel to the past and hunt<br />the extinct Faceworms! | ||
| + | |Link=Faceworm's Nest | ||
| + | }} | ||
| + | {{Instance | ||
| + | |Name=Sara's Memory | ||
| + | |Image=Instance03 | ||
| + | |Level=99 | ||
| + | |Cooldown=23 hours | ||
| + | |Desc=Experience Sara's origins and <br />collect various stat food! | ||
| + | |Link=Sara's Memory | ||
| + | }} | ||
| + | <br clear="both"> | ||
| + | |||
| + | ==Custom== | ||
| + | {{Instance | ||
| + | |Name=Dark Society | ||
| + | |Image=DarkSociety001 | ||
| + | |Level=1 | ||
| + | |Cooldown=No cooldown | ||
| + | |Desc=Help and find the daughter of Adventurer Balin | ||
| + | |Link=Dark Society | ||
| + | }} | ||
| + | {{Instance | ||
| + | |Name=Society Raid | ||
| + | |Image=InstanceSR | ||
| + | |Level=160 | ||
| + | |Cooldown=24 hrs | ||
| + | |Desc=Prevent the destruction of the Dark Society. | ||
| + | |Link=Society Raid | ||
| + | }} | ||
| + | <br clear="both"> | ||
| + | |||
| + | ==Malangdo== | ||
| + | {{Instance | ||
| + | |Name=Malangdo Culvert | ||
| + | |Image=Instance10 | ||
| + | |Level=140 | ||
| + | |Cooldown=1 hours | ||
| + | |Desc=Exterminate {{monster |id=2189 Coelacanths}} and gain<br />materials for [http://irowiki.org/wiki/Malangdo_Enchants Enchantments]! | ||
| + | |Link=Malangdo Culvert | ||
| + | }} | ||
| + | {{Instance | ||
| + | |Name=Octopus Cave | ||
| + | |Image=Instance11 | ||
| + | |Level=60 | ||
| + | |Cooldown=3 hours | ||
| + | |Desc=Fight against a {{monster |id=2194 Giant Octopus}} and<br /> gain materials for [http://irowiki.org/wiki/Malangdo_Enchants Enchantments]! | ||
| + | |Link=Octopus Cave | ||
| + | }} | ||
| + | <br clear="both"> | ||
| + | |||
| + | ==Port Malaya== | ||
| + | {{Instance | ||
| + | |Name=Bangungot Hospital | ||
| + | |Image=InstanceBH | ||
| + | |Level=100 | ||
| + | |Cooldown=23 hours | ||
| + | |Desc=Gain access to an abandoned hospital <br> and exterminate the {{monster |id=2317 evil spirit}} within! | ||
| + | |Link=Bangungot Hospital | ||
| + | }} | ||
| + | {{Instance | ||
| + | |Name=Bakonawa Lake | ||
| + | |Image=InstanceBL | ||
| + | |Level=140 | ||
| + | |Cooldown=23 hours | ||
| + | |Desc=Track down and hunt the legendary <br>{{monster |id=2322 Devourer of the moon!}} | ||
| + | |Link=Bakonawa Lake | ||
| + | }} | ||
| + | {{Instance | ||
| + | |Name=Buwaya Cave | ||
| + | |Image=InstanceBC | ||
| + | |Level=130 | ||
| + | |Cooldown=23 hours | ||
| + | |Desc=Investigate rumors about a treasure <br> and defeat the elusive {{monster |id=2319 Buwaya}}! | ||
| + | |Link=Buwaya Cave | ||
| + | }} | ||
| + | <br clear="both"> | ||
| + | |||
| + | ==General== | ||
| + | {{Instance | ||
| + | |Name=Endless Tower | ||
| + | |Image=InstanceET | ||
| + | |Level=50 | ||
| + | |Cooldown=3 days | ||
| + | |Desc=Fight various MVP bosses and<br> challenge the enigmatic {{monster |id=1956 Naght Sieger}}! | ||
| + | |Link=Endless Tower | ||
| + | }} | ||
| + | {{Instance | ||
| + | |Name=Horror Toy Factory | ||
| + | |Image=Instance02 | ||
| + | |Level=110 | ||
| + | |Cooldown=23 hours | ||
| + | |Desc=Sneak into a toy factory and <br>find the puppet {{monster |id=2996 Celine Kimi}}! | ||
| + | |Link=Horror Toy Factory | ||
| + | }} | ||
| + | {{Instance | ||
| + | |Name=Infinite Space | ||
| + | |Image=InstanceINF | ||
| + | |Level=100 | ||
| + | |Cooldown=6 hours | ||
| + | |Desc=Explore the ruins beneath Pharos<br>Lighthouse, and create<br>Infinity Weapons and Rift Armors! | ||
| + | |Link=Infinite Space | ||
| + | }} | ||
| + | <br clear="both"> | ||
| + | {{Instance | ||
| + | |Name=Old Glast Heim | ||
| + | |Image=InstanceOGH | ||
| + | |Level=130 | ||
| + | |Cooldown=23 hours | ||
| + | |Desc=Investigate a mysterious time gap <br> and craft powerful [[Temporal Boots]]! | ||
| + | |Link=Old Glast Heim | ||
| + | }} | ||
| + | {{Instance | ||
| + | |Name=Orc Memory Dungeon | ||
| + | |Image=Instance07 | ||
| + | |Level=30 | ||
| + | |Cooldown=2 hours | ||
| + | |Desc=Time-travel and fight an {{monster |id=1087 Orc Hero}}! | ||
| + | |Link=Orc Memory Dungeon | ||
| + | }} | ||
| + | <br clear="both"> | ||
| + | {{Instance | ||
| + | |Name=Sealed Shrine | ||
| + | |Image=Instances06 | ||
| + | |Level=75 | ||
| + | |Cooldown=12 hours | ||
| + | |Desc=Challenge the legendary {{monster |id=1929 Baphomet}}<br />and craft a {{item |id=5374 Gigantic Magestic Goat}}! | ||
| + | |Link=Sealed Shrine | ||
| + | }} | ||
| + | {{Instance | ||
| + | |Name=Wolfchev's Laboratory | ||
| + | |Image=InstanceWL | ||
| + | |Level=150 | ||
| + | |Cooldown=72 hours | ||
| + | |Desc=Explore the depths of the Bio Labs <br> and create exclusive [[Biolab Gear |equipment]]! | ||
| + | |Link=Wolfchev's Laboratory | ||
| + | }} | ||
| + | {{Instance | ||
| + | |Name=Endless Cellar | ||
| + | |Image=InstanceET | ||
| + | |Level=50 | ||
| + | |Cooldown=3 days and 20 hours | ||
| + | |Desc=Fight various MVP bosses and<br> explore the depths of the cellar! | ||
| + | |Link=Endless Cellar | ||
| + | }} | ||
| + | <br clear="both"> | ||
| + | |||
| + | ==New World== | ||
| + | {{Instance | ||
| + | |Name=Hazy Forest | ||
| + | |Image=Instance09 | ||
| + | |Level=95 | ||
| + | |Cooldown=2 hours 30 minutes | ||
| + | |Desc=[[A Guide to Mora |Traverse through the maze]] and rescue<br />the {{monster |id=2131 Guardian of Yggdrasil}}! | ||
| + | |Link=Hazy Forest | ||
| + | }} | ||
| + | {{Instance | ||
| + | |Name=Nidhoggur's Nest | ||
| + | |Image=Instance08 | ||
| + | |Level=70 | ||
| + | |Cooldown=23 hours | ||
| + | |Desc=Get a chance to vanquish<br />Nidhoggur's Shadow! | ||
| + | |Link=Nidhoggur's Nest | ||
| + | }} | ||
| + | <br clear="both"> | ||
| + | |||
| + | [[Category:Features]] [[Category:Instances]] | ||
Revision as of 05:07, 20 February 2021
Instance UI
{{#evt:
service=youtube
|id=https://youtu.be/UPwl4NZjhc4
}}
Instance Points
Finishing instances in Shining Moon also grant you Instance Points based on the difficulty of the instance.
Finishing certain instances also count towards the Weekly Memorial Dungeon Quest from the Instance Manager.
Instance Difficulty Modes
In Shining Moon RO, there are five instance difficulty modes - New Moon (Easy), Crescent Moon (Normal), Quarter Moon (Hard), Nightmare Mode, and Hell Mode.
Each mode has it's own settings regarding exp, drop rates, and damage adjustments. See below for more information.
New Moon (Easy)
• You deal 25% extra damage to Instance Monsters.
• Monsters deal 10% less damage in this Instance.
• Monsters have halved drop chance on every item.
• Monsters give halved EXP.
Crescent Moon (Normal)
• You deal normal damage to Instance Monsters.
• Monsters deal normal damage in this Instance.
• Monsters have normal drop chance on every item.
• Monsters give normal EXP.
• Monsters in this difficulty have the PCNEARCHECK, FoVRESET and STATERESET.
Quarter Moon (Hard)
• You deal 40% less damage to Instance Monsters.
• Monsters deal 5% extra damage in this Instance.
• Monsters have an additional 15% drop chance on every item.
• Monsters give 15% more EXP.
• Boss Monsters have 25% additional HP.
• Monsters in this difficulty have the PCNEARCHECK, FoVRESET and STATERESET.
Nightmare Mode
• You deal 70% less damage to Instance Monsters.
• Monsters deal 10% extra damage in the Instance.
• Monsters have an additional 50% drop chance on every item.
• Monsters give 50% more EXP.
• Every Monster in this instance will have a random modifier.
• Monsters in this difficulty have the PCNEARCHECK, FoVRESET and STATERESET.
Hell Mode
• You deal 90% less damage to Instance Monster.
• Monsters deal 20% extra damage in this instance.
• Monsters have an additional 100% drop chance on every item.
• Monsters give 100% more EXP.
• Every Monster in this Instance will have a random modifier.
• Monsters in this difficulty have the PCNEARCHECK, FoVRESET and STATERESET.
PCNEARCHECK - If you're fighting an Instance Monster and you die, the AI will now automatically count that as no one around it anymore. And not refresh the Hard AI Timer. This only applies to normal and above.
FoVRESET - If you leave the Field of View of a monster for more than 10 seconds, the monster will automatically reset itself. This only applies to normal and above.
STATERESET - If you're the only one fighting an Instance Monster and you die, the monster will automatically reset after an interval of 10 seconds which will cause the monster to heal itself back to full health and remove every negative debuff placed on the monster and put the AI back into Lazy mode. This only applies to normal and above.
Terra Gloria
| Werner Laboratory |
|---|
| File:Werner.png |
| Inside the Heart Hunter Base a massive Laboratory was found. |
| Required Level: 160+ |
| Cooldown: 1 day |
| Guide |
Banquet for Heroes
| Room of Consciousness |
|---|
| File:Roomofcon.png |
| Confront Bijou who's stealing the Heart of Ymir from Tera Gloria! |
| Required Level: 100+ |
| Cooldown: 1 day |
| Guide |
| Sky Fortress |
|---|
| File:Skyfortress.png |
| Find the root of Prontera's Invasion and collect Vicious Weapons! |
| Required Level: 145+ |
| Cooldown: 3 days |
| Guide |
Phantasmagorica
| Charleston Crisis |
|---|
| File:InstanceCC.png |
| Help Charleston 2 replacing her malfunctioning components! |
| Required Level: 130+ |
| Cooldown: 20 hours |
| Guide |
| Last Room |
|---|
| File:InstanceLR.png |
| Discover the secrets of a hidden passageway under the safety bunker! |
| Required Level: 140+ |
| Cooldown: 23 hours |
| Guide |
| Central Laboratory |
|---|
| File:InstanceCL.png |
| Travel to the past and observe an experiment gone wrong! |
| Required Level: 140+ |
| Cooldown: 23 hours |
| Guide |
Decisive Battle
Part II
| Nightmarish Jitterbug |
|---|
| File:InstanceNJ.png |
| Go through a musical dungeon and get exclusive equipment! |
| Required Level: 120+ |
| Cooldown: 23 hours |
| Guide |
| Temple of the Demon God |
|---|
| File:InstanceTG.png |
| Confront Satan Morroc in the universe he has created! |
| Required Level: 160+ |
| Cooldown: 23 hours |
| Guide |
Part I
| Bios Island |
|---|
| File:InstanceBI.png |
| Travel through a land of aging enemies and get heroic gear! |
| Required Level: 160+ |
| Cooldown: 23 hours |
| Guide |
| Morse's Cave |
|---|
| File:InstanceMC.png |
| Fight through a demon's twisted imagination. |
| Required Level: 160+ |
| Cooldown: 23 hours |
| Guide |
Heroes' Trails
Part III
| Airship Assault |
|---|
| File:InstanceAA.png |
| Join Chaos and his friends and defend the airship from Arcana the Witch! |
| Required Level: 125+ |
| Cooldown: 23 hours |
| Guide |
| Sarah and Fenrir |
|---|
| File:InstanceSF.png |
| Assist Fenrir in defeating the powerful Valkyrie Sarah! |
| Required Level: 145+ |
| Cooldown: 3 Days |
| Guide |
Part II
| Geffen Magic Tournament |
|---|

|
| Fight powerful warriors for glory and buy exclusive equipment! |
| Required Level: 99+ |
| Cooldown: 23 hours |
| Guide |
| Ghost Palace |
|---|
| File:Instance04.png |
| Experience Sakray's tragic tale to get Thanatos Weapons & Gray Equipment. |
| Required Level: 120+ |
| Cooldown: 23 hours |
| Guide |
| Devil's Tower |
|---|
| File:InstanceDT.png |
| Fight alongside Loki to stop the ritual of the Evil Believer! |
| Required Level: 130+ |
| Cooldown: 23 hours |
| Guide |
Part I
| Faceworm's Nest |
|---|

|
| Travel to the past and hunt the extinct Faceworms! |
| Required Level: 140+ |
| Cooldown: 23 hours |
| Guide |
| Sara's Memory |
|---|
| File:Instance03.png |
| Experience Sara's origins and collect various stat food! |
| Required Level: 99+ |
| Cooldown: 23 hours |
| Guide |
Custom
| Dark Society |
|---|
| File:DarkSociety001.png |
| Help and find the daughter of Adventurer Balin |
| Required Level: 1+ |
| Cooldown: No cooldown |
| Guide |
| Society Raid |
|---|
| File:InstanceSR.png |
| Prevent the destruction of the Dark Society. |
| Required Level: 160+ |
| Cooldown: 24 hrs |
| Guide |
Malangdo
| Malangdo Culvert |
|---|

|
| Exterminate Coelacanths and gain materials for Enchantments! |
| Required Level: 140+ |
| Cooldown: 1 hours |
| Guide |
| Octopus Cave |
|---|

|
| Fight against a Giant Octopus and gain materials for Enchantments! |
| Required Level: 60+ |
| Cooldown: 3 hours |
| Guide |
Port Malaya
| Bangungot Hospital |
|---|

|
| Gain access to an abandoned hospital and exterminate the evil spirit within! |
| Required Level: 100+ |
| Cooldown: 23 hours |
| Guide |
| Bakonawa Lake |
|---|

|
| Track down and hunt the legendary Devourer of the moon! |
| Required Level: 140+ |
| Cooldown: 23 hours |
| Guide |
| Buwaya Cave |
|---|

|
| Investigate rumors about a treasure and defeat the elusive Buwaya! |
| Required Level: 130+ |
| Cooldown: 23 hours |
| Guide |
General
| Endless Tower |
|---|

|
| Fight various MVP bosses and challenge the enigmatic Naght Sieger! |
| Required Level: 50+ |
| Cooldown: 3 days |
| Guide |
| Horror Toy Factory |
|---|

|
| Sneak into a toy factory and find the puppet Celine Kimi! |
| Required Level: 110+ |
| Cooldown: 23 hours |
| Guide |
| Infinite Space |
|---|
| File:InstanceINF.png |
| Explore the ruins beneath Pharos Lighthouse, and create Infinity Weapons and Rift Armors! |
| Required Level: 100+ |
| Cooldown: 6 hours |
| Guide |
| Old Glast Heim |
|---|

|
| Investigate a mysterious time gap and craft powerful Temporal Boots! |
| Required Level: 130+ |
| Cooldown: 23 hours |
| Guide |
| Sealed Shrine |
|---|

|
| Challenge the legendary Baphomet and craft a Gigantic Magestic Goat! |
| Required Level: 75+ |
| Cooldown: 12 hours |
| Guide |
| Wolfchev's Laboratory |
|---|
| File:InstanceWL.png |
| Explore the depths of the Bio Labs and create exclusive equipment! |
| Required Level: 150+ |
| Cooldown: 72 hours |
| Guide |
| Endless Cellar |
|---|

|
| Fight various MVP bosses and explore the depths of the cellar! |
| Required Level: 50+ |
| Cooldown: 3 days and 20 hours |
| Guide |
New World
| Hazy Forest |
|---|
| File:Instance09.png |
| Traverse through the maze and rescue the Guardian of Yggdrasil! |
| Required Level: 95+ |
| Cooldown: 2 hours 30 minutes |
| Guide |
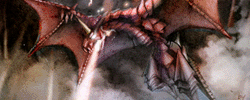
| Nidhoggur's Nest |
|---|
|
| Get a chance to vanquish Nidhoggur's Shadow! |
| Required Level: 70+ |
| Cooldown: 23 hours |
| Guide |
